| Story of the Green Canoe |
|
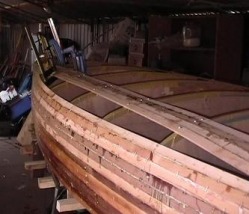
Setting up the building jig.
This looks like not much progress to me now, but building the 'jig', fitting wheels to the building jig, cutting out all the frames, mounting them along the board (accurately), and fitting the planks so far is about a weeks full time work. Each plank takes from 15 to 45 minutes depending on the fitting difficulty.This has been spread out over a nine months since the plans were ordered, while I completed pressing house renovations. During that time I had to find a nice dry, flat place to store the 5 metre lengths of timber (which I bought shortly after the plans arrived in a flurry of enthusiasm) . I also spent some time experimenting with the glue on other small projects so I had a feel for its capabilities. The original timber size specified on the plans was 6mm thick, X 15mm wide X 470 lineal metres, but the 22 x 6mm was on special (9th may 2005 - $350 for 330 lineal metres ) when I went to the timber place. It has worked out ok, but for a clear finished hull, extra thickness (even up to 7 or 8 mm) would be very useful when fairing and finishing the hull. 29th March 2008 - NOTE - For anyone planning to build a canoe themselves, later in this blog, I discover that bolting (not screwing or gluing) the frames to the supporting 'bench' saves a lot of problems when removing the hull.Also, I think up a better way to attach the two bow shaping sections to make building and frame removal much easier.
Planks on The Edge (I have a stapler, and I am not afraid to use it !!! )
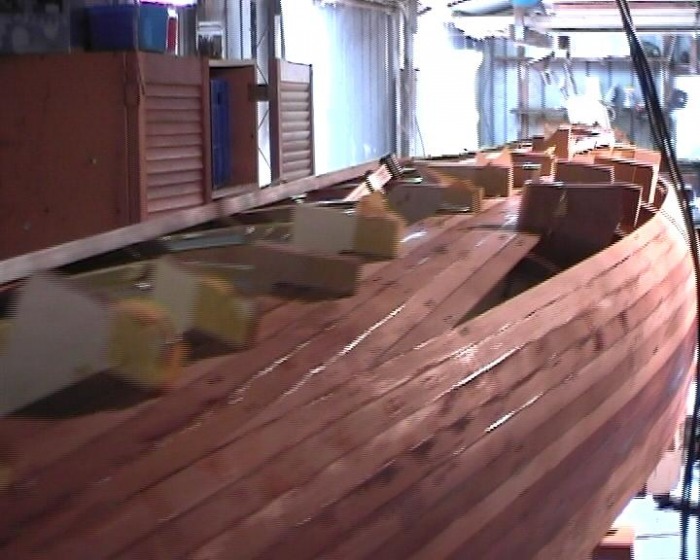
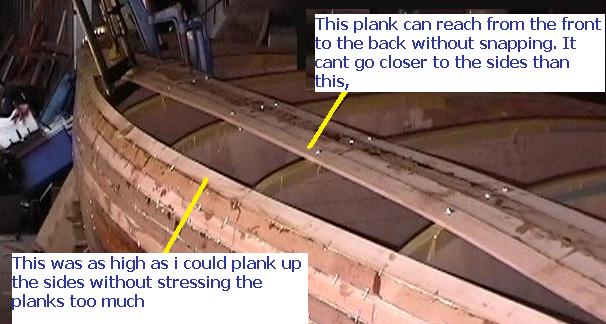
Planking up the sides was 'easy', although a lot of care was taken to make sure all the planks were curved nicely from bow to stern. When I got to the bilge (beginning of the curve on the plywood moulds) , suddenly the planks all wanted to run in an arch, as well as being curved from bow to stern. The last plank on top of the 'side' was a real stretch. In fact both planks on the top of each side ended up snapping from the strain, and had to be repaired.
My solution after a lot of thinking was to run a plank as close to the top of the sides as it would go without snapping, yet could still reach all the way from the bow to the stern. The gap from that plank to the existing planks at the turn of the bilge, was about 20 cms. I will 'fill in' this space using specially cut 'fill in' planks.
My solution after a lot of thinking was to run a plank as close to the top of the sides as it would go without snapping, yet could still reach all the way from the bow to the stern. The gap from that plank to the existing planks at the turn of the bilge, was about 20 cms. I will 'fill in' this space using specially cut 'fill in' planks.

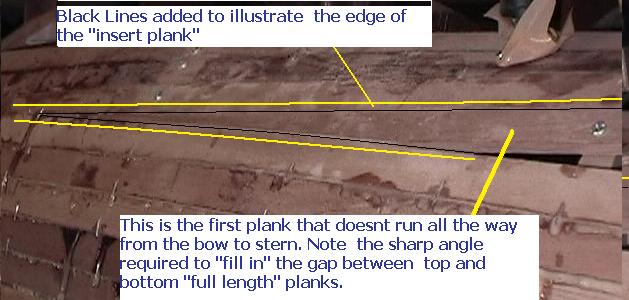
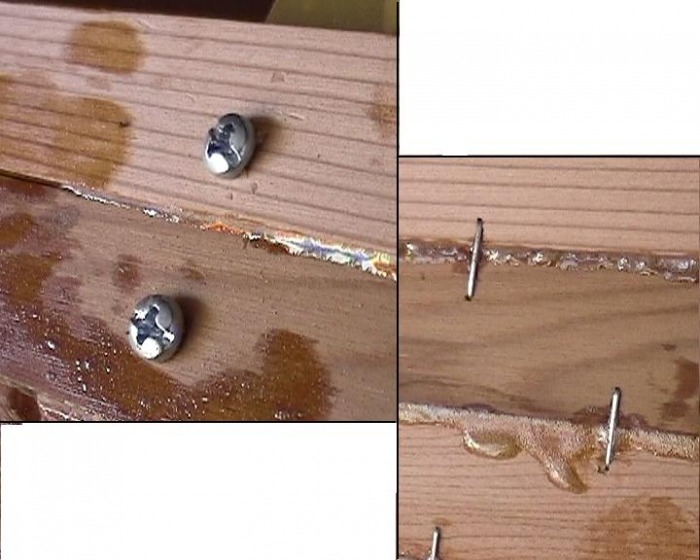
When 'filling in the gaps' around the tight curve of the hull, the planks join the 'sides' as a sharp diagonal. This means that I need to make some close joints. One picture has been 'enhanced' to show the details of the join. In real life, the glue fills in the gaps wonderfully.
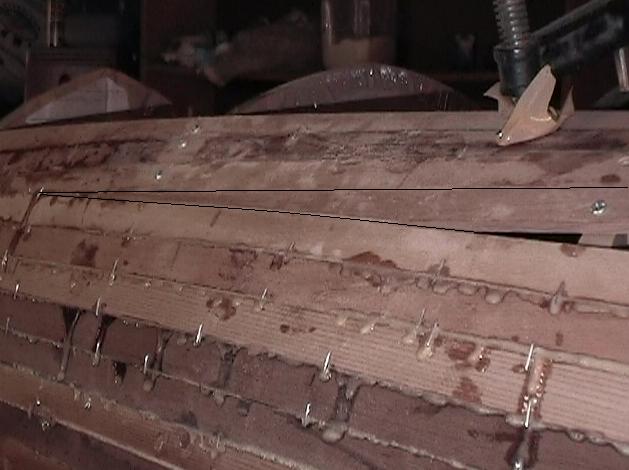
The join has to be done at both ends of the plank, and the whole things has to be fitted in accurately. I start at one end, getting a perfect fit, and then screw the plank down almost to the other end. Then I measure and cut that 'other' end to shape with a small saw, and sand it with a 'powerfile' until it fits into place.
Then all the screws are undone far enough to lift the plank off the moulds, glue is applied to both edges of the shaped plank, and the plank is re-fitted. Usually the sharp ends have to be held down in the correct joining angle with "bits of wood in packing tape" (BOWIPT), and screws.
Tricks of the Trade
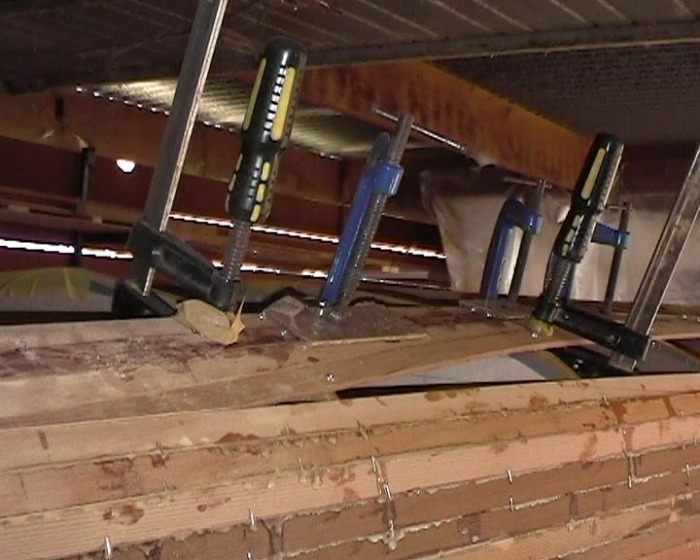
Due to the need to do tight bends, slight irregularities in the moulds, small imperfections in the timber planks, quite a lot of 'persuasion' may need to be used to make some planks stay in line while the glue sets.
Make sure you put packing tape over the contact points of the g-clamps to prevent the metal from being securely bonded to the planks.
NOTE FOR FUTURE - because of the mess the glue makes on the inside of the canoe, and the difficulty of cleaning as you go - I would be tempted to apply packing tape to the inside of every plank before it is glued in place. In theory then, when the canoe is turned over, the packing tape could be pulled off, leaving a clean plank. This would be a real gift if you are doing a clear interior.
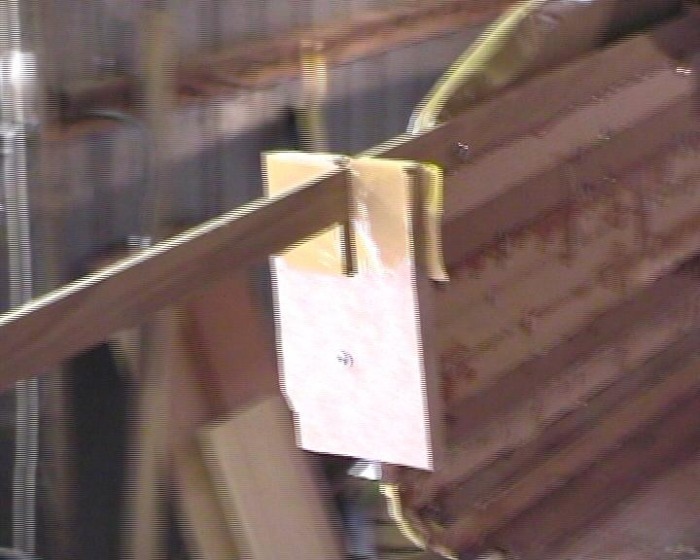
For the planks that go over the bow and stern moulds, I found a great way to hold the ends in place. he full length bottom planks have to be turned 45 degrees to join the bow. It is much easier if you use a piece of wood with a 'plank sized' groove, screwed in to the bow, to hold the twist as you fasten the plank in place on the mould. It only takes one screw in the "clamp" to hold it in place, and this allows a bit of positioning adjustment as the plank is screwed onto the moulds.
Make sure you put packing tape over the contact points of the g-clamps to prevent the metal from being securely bonded to the planks.
NOTE FOR FUTURE - because of the mess the glue makes on the inside of the canoe, and the difficulty of cleaning as you go - I would be tempted to apply packing tape to the inside of every plank before it is glued in place. In theory then, when the canoe is turned over, the packing tape could be pulled off, leaving a clean plank. This would be a real gift if you are doing a clear interior.
For the planks that go over the bow and stern moulds, I found a great way to hold the ends in place. he full length bottom planks have to be turned 45 degrees to join the bow. It is much easier if you use a piece of wood with a 'plank sized' groove, screwed in to the bow, to hold the twist as you fasten the plank in place on the mould. It only takes one screw in the "clamp" to hold it in place, and this allows a bit of positioning adjustment as the plank is screwed onto the moulds.