| Story of the Green Canoe |
|
The Furniture 28 November 2007
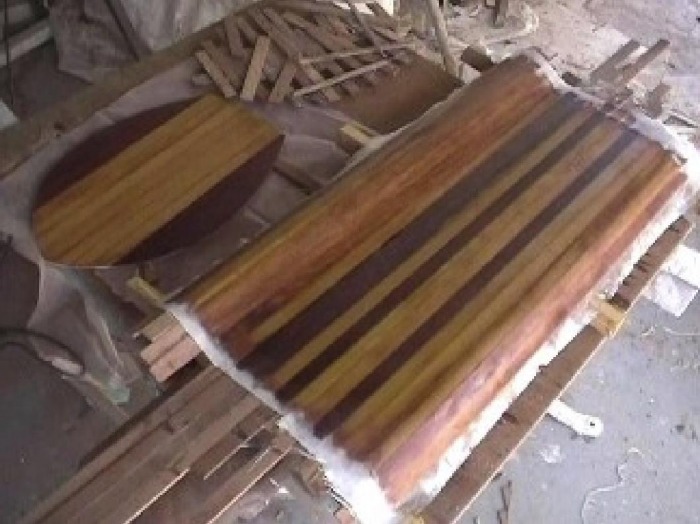
The interior furnishings are now in production. They consist of two seats made with strip planking, and two inside ends also made with strip planking. Both ends will seal a watertight compartment at either end. The forward compartment is largely filled with expanded foam, but the rear compartment will be available for storage.
This picture shows the template (upper left) made of scraps of timber held together with hot melt glue, that I glued together in place inside the hull. This is an easy way to get an accurate pattern to use for interior structures.
REVISED PLAN -I built the curved strip seats before i figured out a way to attach them to he hull. In future I would build the supporting frame first, fit it to the hull, and *then* create the curved strip plank seat on it.
"Final" Touches 05 December 2007
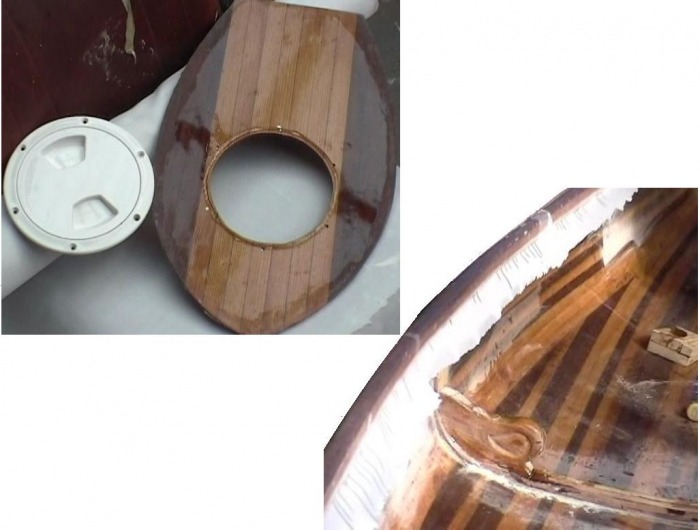
This is the last 5% that takes 30% of the project. Lots of small things that end up being time consuming. One picture shows one of the waterproof ends, all cut out, varnished ready for the plastic inspection hatch and then fitting to the canoe. It also shows a progress picture for the gunwales (edges) of the canoe after applying fibreglass tape to the edge. An old trick for fitting waterproof things to holes, run a bead of silicone around the edge and let it cure *before* bolting it in place. This ensures a waterproof 'gasket' effect, not just a lot of squished silicone.
The gunnel (edges) were tricky to apply fibreglass tape to. Because of the shape (acute edge angles) and size of the wood around the edges, the tape was inclined to lift away from the wood before the epoxy cured. I found that by applying 'peel ply' over the fibreglass, this lifting effect was reduced considerablyby the extra pressure, and it was easy to see where the fibreglass was not in direct contact with the timber. I was able to keep on smoothing out the wrinkles and non-contact places without disturbing the fibreglass cloth, under the peel ply. This picture shows the edges covered with fibreglass and peel ply while curing.
In any future projects, I would spend a lot more time rounding the edges of the gunnel timber, almost to make an oval section shape.
REVISED PLAN -it was a bad idea to varnish the ends prior to fibreglassing them into the ends of the canoe. The varnish made clear coverage by later coats of epoxy very difficult, and it was hard to sand off prior to epoxying.
Neeeeeeaaaaaaaarly Finished ... 02 January 2008
I have been held up by a week or so of really wet weather before Xmas, and Xmas itself, so I am way behind my mental schedule. This picture shows the final coats of epoxy being laid on carefully. The boat is suspended on its side, with one end tilted down, to epoxy on one half of one side (thats a quarter - folks) . This is to minimise time consuming epoxy runs. The epoxy sanding up to now has been done with 60 or 80 grit 'sandpaper' for speed.
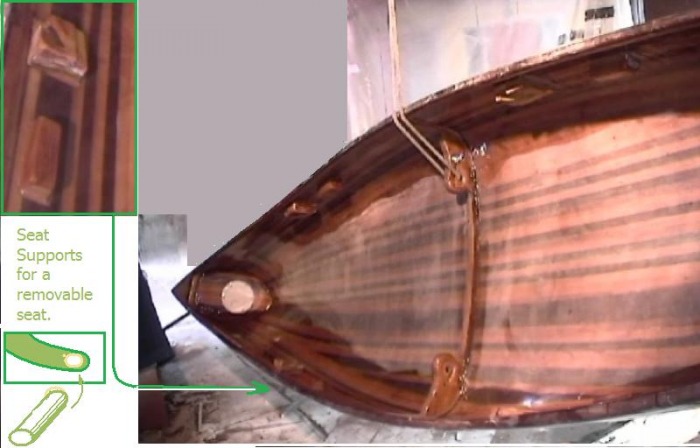
Once each 'quarter' of the boat is done, I will do the final epoxy on the floor with the boat horizontal, and do a final sand of the whole inside with 100 grit, prior to varnishing. This is so the varnish coats won't show too many 'scratches' . The damp weather did not bode well for adding epoxy, varnishing or painting - but the last week has been great (very hot). Even so the process of completing the final epoxy coats is extremely fiddly. Measuring, fitting and gluing the seat supports into their correct place on the sides of the canoe,has been very time consuming. I decided to anchor them with fibreglass as well as glue and stainless steel screws. This meant about four coats of epoxy around the seat supports, and the corresponding sanding back for runs, drips etc.
The strength should be worth it as they will be sat, stood and jumped on by heavy people, I am sure. I spent a lot of time trying to devise the ultimate seat supports. The supports hold a removable wooden rod that the seats sit on, a bit like a toilet roll holder. I had hoped to incorporate some tilt adjustment to the seats as well, but my patience and creativity ran out. I just hope the seats are at a comfortable angle as built, or I will be doing some more carpentry very soon.
