| Story of the Green Canoe |
|
Mixing Goo
12th March 2007 -The final planks got installed some weeks ago, along with the last of the 'stealer' planks on the raised bits at each end, and now comes the process of preparing the hull for the fibreglass. With hand and orbital sander I have been sanding the planks to get a better finish, removing excess glue, sharp edges on planks etc. As it is not going to be a transparent finish, I am filling imperfections with a combination of epoxy and 'microballoons', mixed into a smooth paste. This mixture is easy to sand, while being waterproof and lightweight. This gets pasted into low spots, screw holes and any small gaps between planks. In the next stage, I will be 'painting' a coat of epoxy over the whole hull to seal the timber, before glassing fibreglass cloth onto the outside of the hull. I prefer to get the contours and finish as close to perfect before the fibreglass coating, as I think its preferable to have as much tough, waterproof material near the water, and keep the softer 'filling' material 'inside the envelope'.
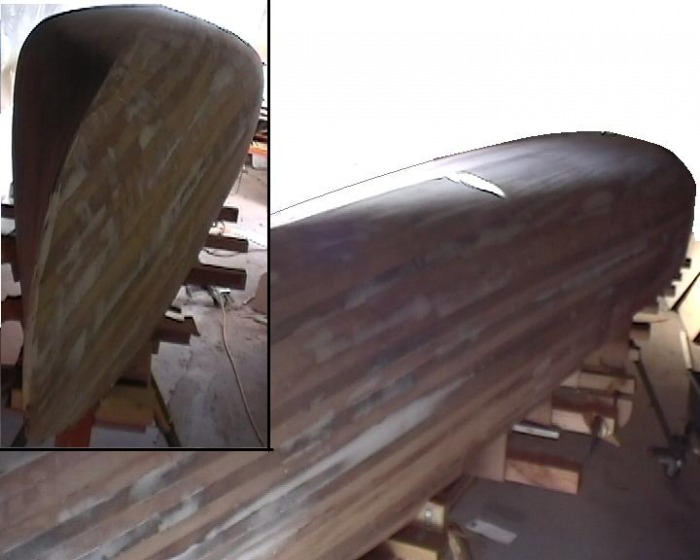
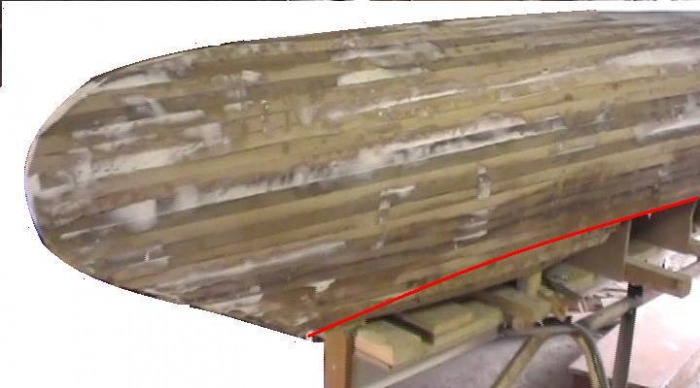
The stealer planks are the 'extra' bits of planking that build up the bow so the shape of the hull can be created. Without a lot of effort, the 20 mm planks can't be bent sufficiently to provide the curve that follows the designed hull shape (shown by the red line on this photo). So shorter bits of planking are glued at each end to make up the 'missing' part of the hull. The next major challenge will be to bend the rubbing strip along the 'gunwale' to match the hull shape. (also following the red line) . This may require some steaming of timber to get the correct shape, which is something I have never done, but from all reports is quite straightforward.
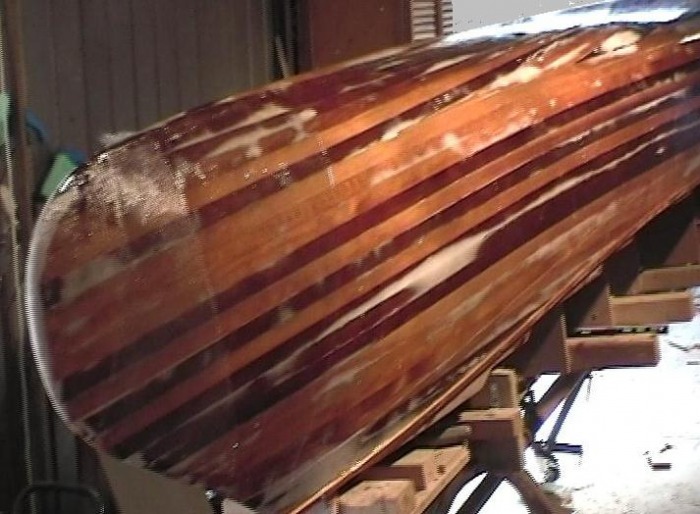
Almost one year since I bought the original plans. Since the last entry I have been out and purchased 20 metres of fibreglass cloth. Before I lay that cloth though, a bit of preparation is needed. The plans call for re-inforcing of both ends with extra layers of f'glass. That done, I have gone a bit futher and also laid a ribbon of 200 gm cloth along the keel line, and another line around the 'edge' ( gunnel) of the canoe as well. I also glued a rubbing strip around the gunnel while I could see the screw holes. Rather than steam the plank, I just sawed it narrower, and it was easy to fit. This should give me some extra re-inforcing for two key areas of stress on the hull, as well as the bow and stern areas. Also, in preparation for the main layer of fibreglass, I have rolled on two coats of epoxy to seal the wood. This should prevent 'dry' spots when applying the final layer of cloth. The effect on the wood is so impressive, I have decided to complete the interior with a clear epoxy finish and varnish. Maybe I can do a totally clear version next time? I have enough timber strips for half a hull left. .......
NOTE 28th March 2008. In my opinion, the interior needs to be left clear, as the difficulty level of making the insides smooth enough to look good with a painted surface is huge. If I painted the interior of this finished boat, you would see all the bumps, ridges etc but with a clear timber interior, it is not all all noticable with all the lovely wood grain.
