| Story of the Green Canoe |
|
The 10% of effort that takes 60% of the time and money !
Popping the hull - Frame removal 01 July 2007
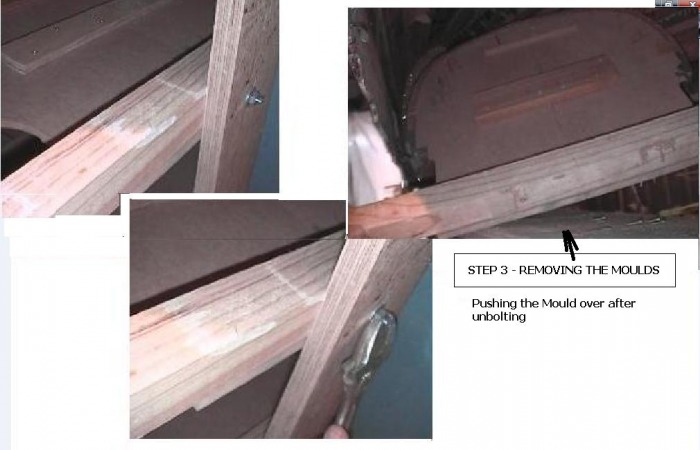
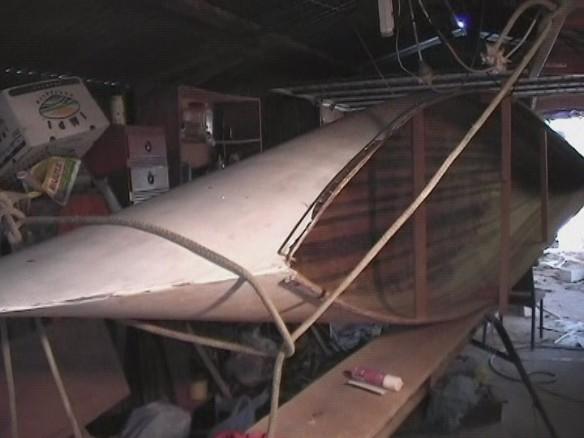
Wow - I did something right. Bolting the moulds to the building jig was just the best idea. It would have been so hard to undo them if I had screwed them to the plank. Using screws would have meant pushing a screwdriver into some very awkward angles, and having to push down with bent arms. The heads would probably have got glue in them too. With bolts, the frames were really easy to remove. This 3 step photo shows unbolting a mould, and pushing it over. The moulds were made in 2 halves as suggested in the book, to allow for the curved sides, but the sides of the canoe were flexible enough to avoid having to unscrew the two halves of the mould. They could just be slid out of position very easily after being unbolted.
Wow - I did something right. Bolting the moulds to the building jig was just the best idea. It would have been so hard to undo them if I had screwed them to the plank. Using screws would have meant pushing a screwdriver into some very awkward angles, and having to push down with bent arms. The heads would probably have got glue in them too. With bolts, the frames were really easy to remove. This 3 step photo shows unbolting a mould, and pushing it over. The moulds were made in 2 halves as suggested in the book, to allow for the curved sides, but the sides of the canoe were flexible enough to avoid having to unscrew the two halves of the mould. They could just be slid out of position very easily after being unbolted.
Turning Over a new canoe 2 - July 2007
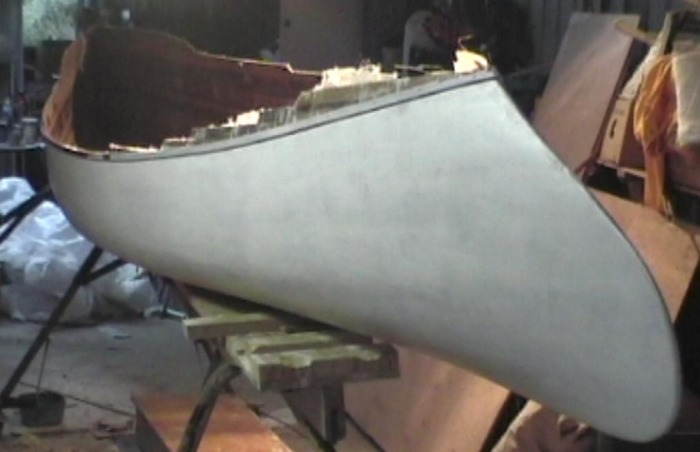
The canoe was so light to pick up, I could do it with one hand. Without the inside fibreglassing though, the sides were very flexible. I put some temprary bracing inside, so the hull wouldnt distort as I moved it about. I fitted a small bit of timber where the rubbing strip should go, before the undercoating so I could SEE the screw holes to help line up the gunnel line. It was a good idea as it made the positioning very easy, and also helped make the sides a little more rigid when moving the half finished hull around. I am glad the canoe looks as good as I had hoped. I had only seen a small picture of a finished canoe before I ordered the plans, but the full size canoe looks as good as I have wished for. My reason for only undercoating the hull before turning it over, was to allow for a few bumps and knocks while completing the insides. I will completely 'do' the insides, then I will apply the final coats to the outside.
The canoe was so light to pick up, I could do it with one hand. Without the inside fibreglassing though, the sides were very flexible. I put some temprary bracing inside, so the hull wouldnt distort as I moved it about. I fitted a small bit of timber where the rubbing strip should go, before the undercoating so I could SEE the screw holes to help line up the gunnel line. It was a good idea as it made the positioning very easy, and also helped make the sides a little more rigid when moving the half finished hull around. I am glad the canoe looks as good as I had hoped. I had only seen a small picture of a finished canoe before I ordered the plans, but the full size canoe looks as good as I have wished for. My reason for only undercoating the hull before turning it over, was to allow for a few bumps and knocks while completing the insides. I will completely 'do' the insides, then I will apply the final coats to the outside.
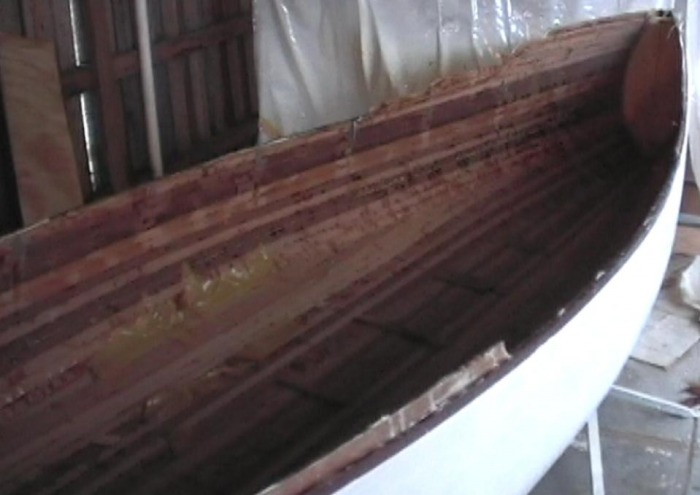
The cleaning up of the inside is a challenge. The inside is a real mess!. I tried a few things. One of the most useful is the strange shaped paint scraper. By running over the edges of the scraper with a grinding wheel, you get a burr on the edges, much like the one created on a cabinet scraper. The curved face is great for raking off the glue runs and other 'bad' bits. The Bosh orbital sander works great for the flattish areas, but the curved areas are too difficult, and it is too big to fit into the ends. Its also very heavy.
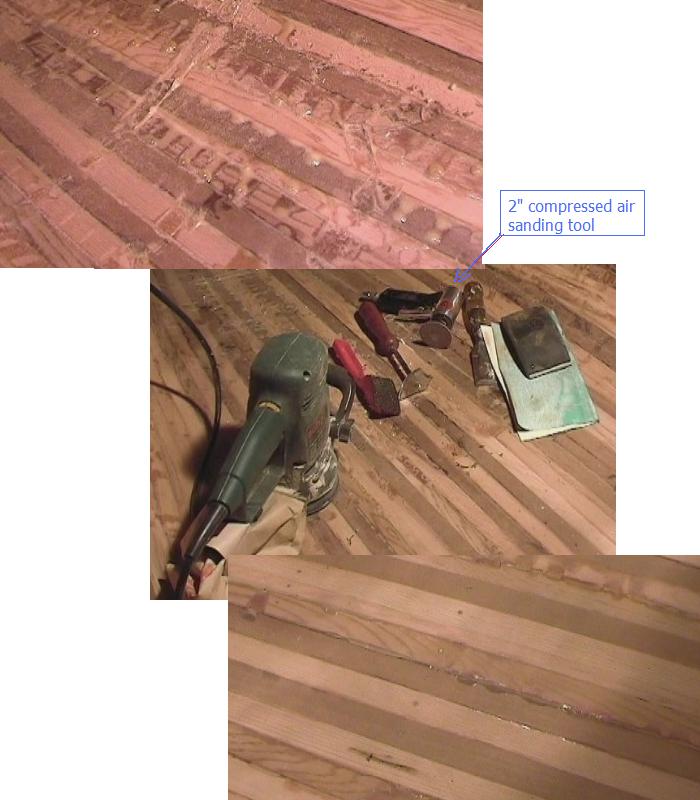
I invested in a 2 inch compressed air sanding tool. This is very effective because it is such a small tool, and useful in tight spaces. With full 360 degree rotation, it is very easy to use, but still a lot of care must be taken not to sand too deeply. It is probably the most valuable item for doing the inside sanding. I found that it is best to use a rapid side to side motion across only two planks at a time. The odd hollow caused by sanding too deep is a major pain in the final sanding process. The red handled item is a curved rasp like tool . It is some use, but leaves quite a rough surface. The good old chisel and sanding block work well but are very tiring.
I invested in a 2 inch compressed air sanding tool. This is very effective because it is such a small tool, and useful in tight spaces. With full 360 degree rotation, it is very easy to use, but still a lot of care must be taken not to sand too deeply. It is probably the most valuable item for doing the inside sanding. I found that it is best to use a rapid side to side motion across only two planks at a time. The odd hollow caused by sanding too deep is a major pain in the final sanding process. The red handled item is a curved rasp like tool . It is some use, but leaves quite a rough surface. The good old chisel and sanding block work well but are very tiring.
A Better Way!
For future reference, I would have built the moulds with another method. It would have made the bow and stern moulds a bit more rigid during construction, made it easier to fit the 'stealer' planks, and made it much less awkward when manouvering the canoe as the frames are removed. It would also have saved time when removing the bow and stern formers from inside the planked hull.
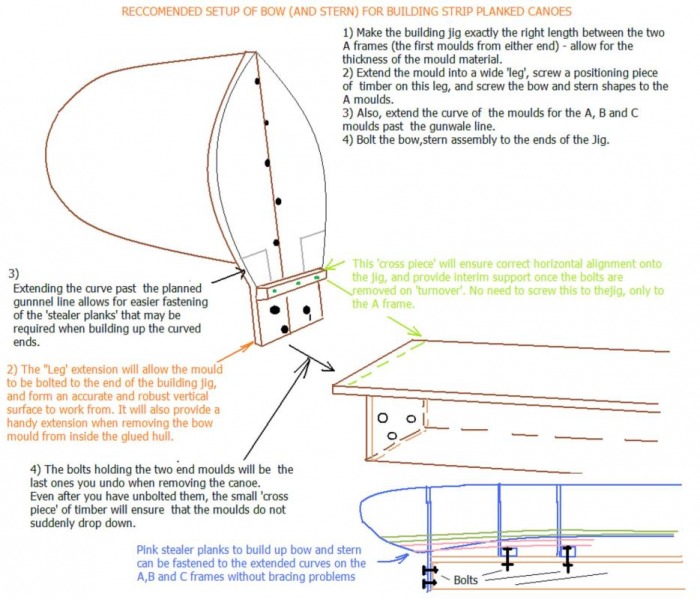
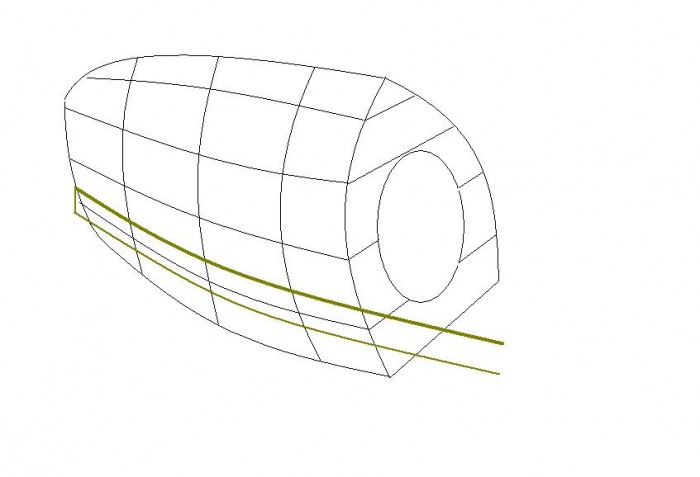
After a lot of consideration, I would be inclined to build two HOLLOW fibreglass "ends" using a mould, like the one in this illustration. They would be the size of the plan dimensions, perhaps on a male mould in two halves to be glued together later. These "ends" would be left in the finished canoe. The planks would still be glued to the outside of these "ends" with epoxy, and either temporarily screwed or held in place with some sort of "bandage" until the glue was dry. This would ensure a high degree of symmetry, but more importantly, save the ridiculous job of pulling the mould ends out of the bow and stern, and having the imposssible task of cleaning the ends out prior to fibreglassing, and then inserting and laying fibreglass inside them. If they were designed with a bulkhead as well, then this would form the basis of sealed compartments, and do away with the difficult job of inserting bulkheads as an afterthought.
